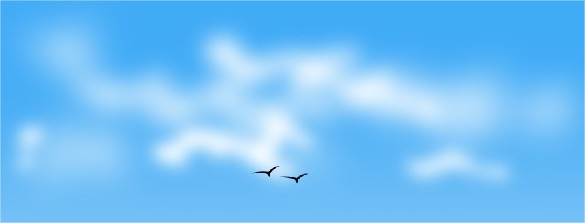
Cloud has the most irregular shape than any other floating bodies over the Earth. Because it is irregular shaped, it’s easy to create clouds that looks realistic in Computer Graphics. Today, we’ll guide you some simple steps to create a realistic looking clouds.
Creating clouds does not require any latest version of Photoshop. We’ll only use Gaussian Blur filter to create clouds, which is available in almost all the version of Photoshop. And of course, a pen tool is necessary. Since, Gaussian Blurring is available in all major images editing software; I’ll be using Photoshop to demonstrate the process.
This is the cloud that we’ll be created after following this tutorial:
First of all, you are going to open a Photoshop. Create a New document with required size.
Then create a new Layer over the Background Layer.
Now move towards the Tools bar and choose Gradient Tool.
In the Gradient Tools settings, just below the Menu bar, click on the gradient.
Edit it in such a way that, the first gradient has darker sky blue color and the second one with lighter sky blue color. Click and draw the sky blue gradient on your drawing window. Look for something similar result as the image below:
Again, add new layer to the sky blue color layer.
Now let’s draw some clouds… Move towards Tools bar and choose Pen Tool.
We’re only going to create a shape with no fill. So, choose the icon as shown in figure, which is located just below the Menu bar.
Draw a medium shaped irregular cloud.
Now in Layer tool box, choose Paths tab and click to highlight Work Path. Click on the dotted circle to marquee select the working path.
Fill the selected region with white color (ALT + BACKSPACE) with white foreground color.
Now deselect all by pressing CTRL + D and select the last layer that you’ve created a cloud in.
Add Gaussian Blur to it.
Choose the blur Radius value about 20 Pixels. Tweak the value until you are satisfied with extreme blurred cloud.
Again add new layer over the last layer.
With Pen tool, draw some small clouds.
This time apply Gaussian blur with little less blur value than 20 pixels.
Again create some layers and draw few more clouds and change the blur value randomly until it looks realistic.
Now select the entire cloud layers and merge them all.
Since you’ve merged clouds, you cannot edit if further. If you think you’ll need to edit it later then don’t merge it, rather place them in separate folder.
Hope this tutorial was helpful.


 Posted in
  Tags:
Tags: