
Due to high demand of WordPress Thesis templates, I thought of converting some popular WordPress Thesis template in to blogger. After five hours of continuous work, finally I have converted WordPress Thesis Blogussion to Blogger. Blogussion for Blogspot Blogger is exact clone of Blogussion Template for WordPress.
Blogussion for Blogger is exactly similar to the original one. No one can easily distinguish between the WordPress thesis theme and your Blogger after you have used this theme. Let’s see what’s featured in new Blogussion for Blogger.

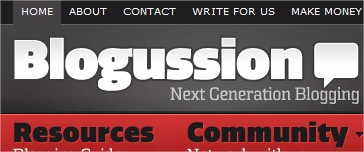
Primary Navigation

Eye catchy navigation by Blogussion still exists for the Blogger Version.
Featured post zone:
You can place any widget in featured post zone. The featured post is less annoying and is visible in every page. Next to it, we’ve three blocks for 125 X 125 ads which was already featured in the original version.
Sidebar as pleasing as in original version
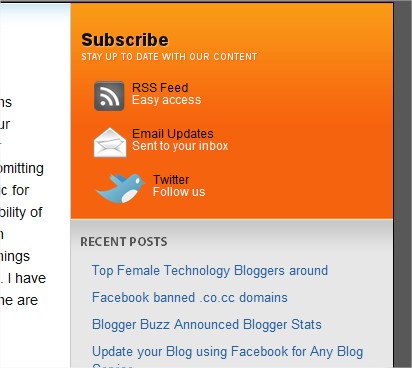
Sidebar section with un-widgetized orange box to focus on your Feeds and subscription links. Below it, we’ve widgetized sidebar with appealing arrangements.
WordPress Like Comments section
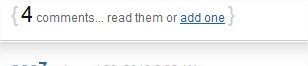
The comment section is more customized and very much different from ordinary comments section and exactly reflects the WordPress looks. Add one link to make it more interactive which directly scrolls down to the comment form.
Avatarized Unique Comments
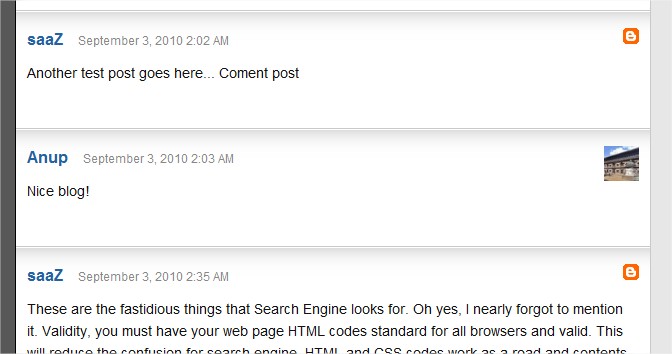
Completely customized comments list which will definitely make your blog look professional and unique. Don’t forget to see the face of the commentor at the right! 🙂
Easy Next Previous Navigation


How to edit Blogussion for Blogger?
- Top Navigation
- Logo and Description
- Secondary Navigation
- Subscribe section
- 125 X 125 ads region
<!-- Top Menu -->
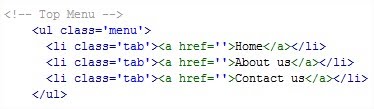
To edit or add new links just define a usual list with ‘class=tab‘ defined.
If you are not getting what I mean, just copy the format below before </ul> tag.
<li class='tab'><a href="http://www.website.com">Link name</a></li>
Change the link and link name according to your need.
Logo and Description

This is the thing that makes your blog unique from others.
First design your own logo with 267 X 45 px size and it must be strictly in transparent PNG format.
After you’ve designed your logo, upload it to any free image host like imgboot, to know more about hosting in image, read this.
When you are done with uploading the logo, copy the direct location to the image and go to the HTML editor of Blogger, Design > Edit HTML.
Search for following:
/* Blog Logo */
Replace your link in background: url(your logo image url here) no-repeat;
Save the template and you’ve successfully created a brand of your blog.
Now you’ll need to define your own description. To define your own description, search for following:
<!-- Logo Region -->

Replace the description of your blog with the one highlighted in red in above image.
Now you are done with Logo and Description.
Secondary Navigation:
To add/remove new links to secondary navigation, search for following:
<!-- Secondary Menu -->
You’ll see image similar to below:
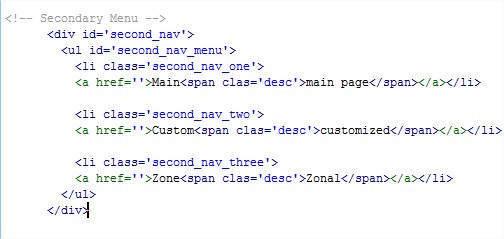
Follow the similar format like below:
<li class="second_nav_three"> <a href="Link Location">LINK NAME<span clas="desc">LINK DESCRIPTION</span> </a></li>Be sure that your link description is inside <span class=”desc”> tag.
Sidebar Subscribtion
To tweak the subscribtion region, search for following:
<!-- Subscribtion -->
Change the highlighted link in:
<li class='rss'>

<a href='http://www.hacktweaks.com' title='Subscribe to the RSS Feed'>

RSS Feed

<span>Easy access</span>

</a>

</li>
to the link to your RSS Subscribtion page.
<li class='email'>

<a href='#' title='Subscribe to the RSS Feed via Email'>

Email Updates

<span>Sent to your inbox</span>

</a>

</li>
In above code snippet, hange the # link to with the link to your email subscription page.
<li class='twitter'>

<a href='http://www.twitter.com/' title='Follow us on Twitter'>

Twitter

<span>Follow us</span>

</a>

</li>
Change the highligted link above to your own twitter homepage.
Ads region
Search for following code:
<!– 125 ads –>
Change the image source and image link with your add in three different lists.
Change remove Labels
If you want labels to be appeared only on post page and not in homepage then do this:
– Search for <span class=’post-labels’>
– Just before the <span> tag add following code:
<b:if cond='data:blog.pageType == "item"'>
– Next look for </span> tag. Just after it add following code:
</b:if>
See the image for more clarification:

If you don’t want lables any where, then delete from <span class=’post-lables’> to </span>.
And that is all you need to do to make your webpage unique and professional. And we again request you leave the footer region as it is. We will like to have it as an appreciation.
Hope you’ll love his template.
 Posted in